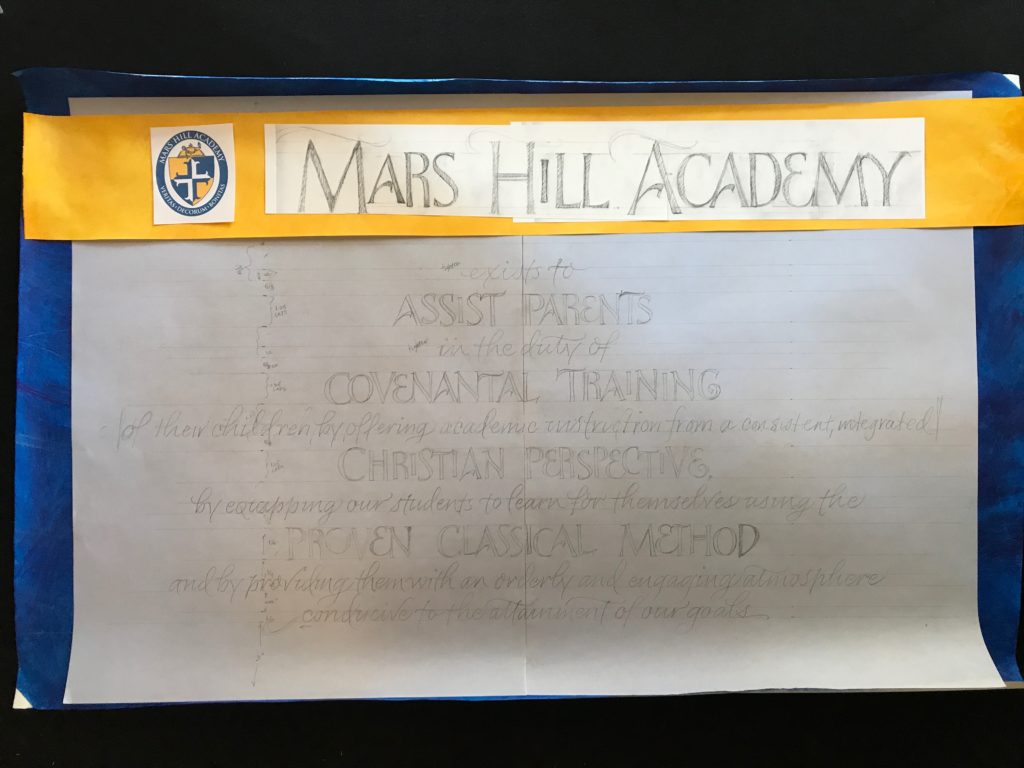
Above is the final scan of the Mission Statement for a private school, in Cincinnati, Ohio. Mars Hill Christian Academy approached me in 2017 to create a document in which they could share the school’s mission. They chose to leave that title off because the words ‘exists to’ states that in a round about way. Below, I will share with you the steps that I took to create it…
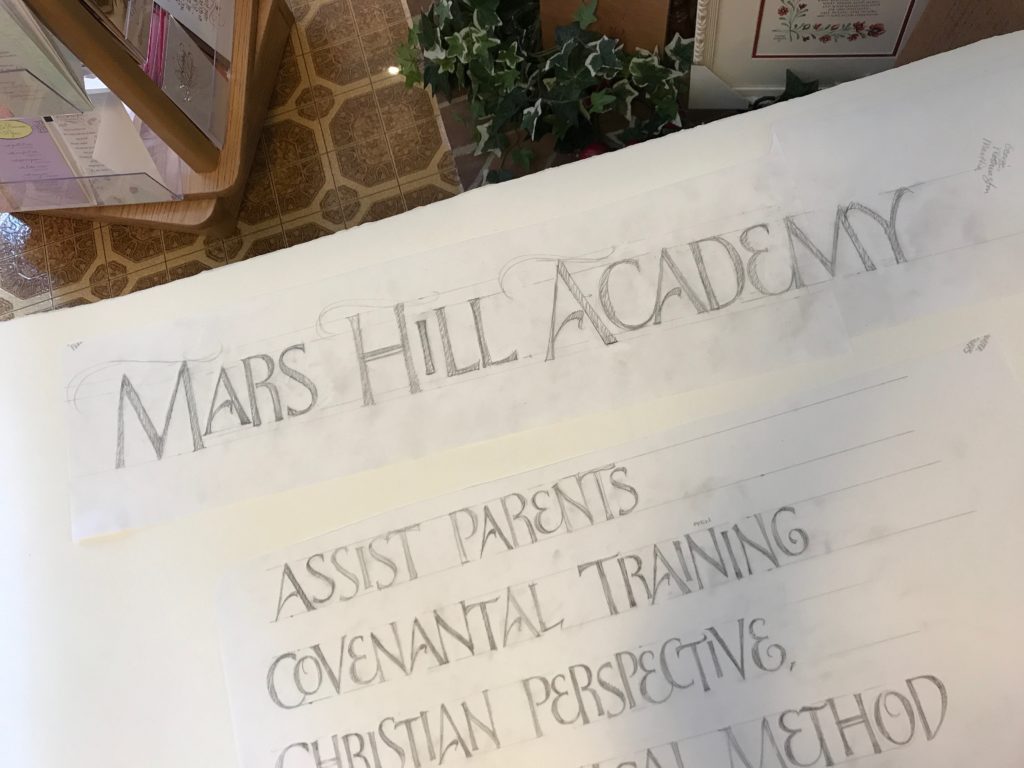
As you might guess, I put pencil to paper and began sketching the words that my client, Lisa Cotterman and I felt were most important. As a calligrapher, I like to have what I call a ‘big read’. Something that a person could read from across the room. In this case, these larger words sum up the mission of the school. I used an HB pencil on heavy tracing paper.
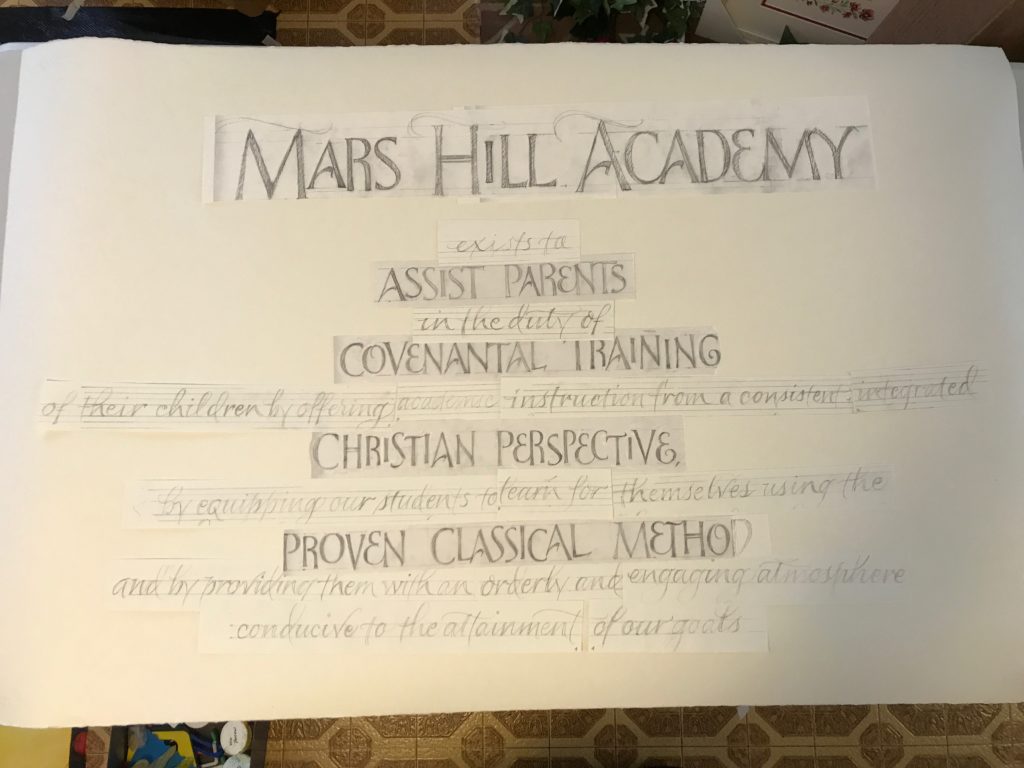
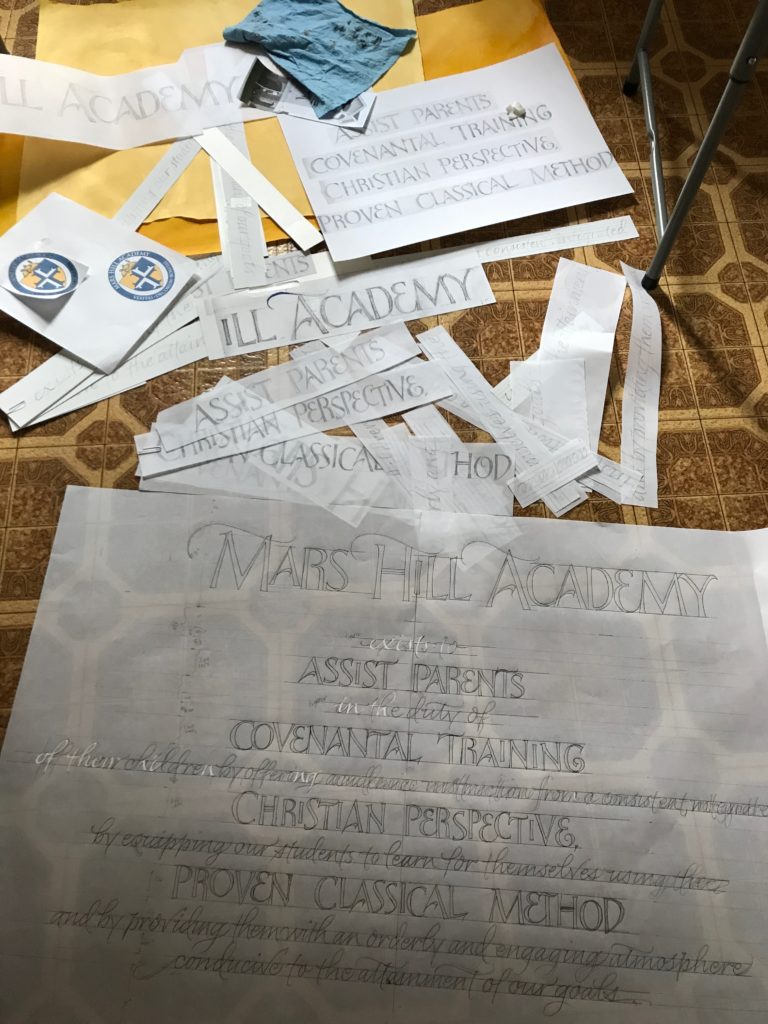
It is typical for my initial sketches to need adjustments. When I looked at the letters on the final paper size they were tight and narrow. I felt that the large letters needed to be rounder and the lines of lettering wider. I scanned the original sketches into Photoshop and stretched the lines, then reprinting the lines, I cut them apart and retraced them onto the full size rough sketch. See below.
So as you can see, I created a pencil layout just the way I wanted the final lettering to be.
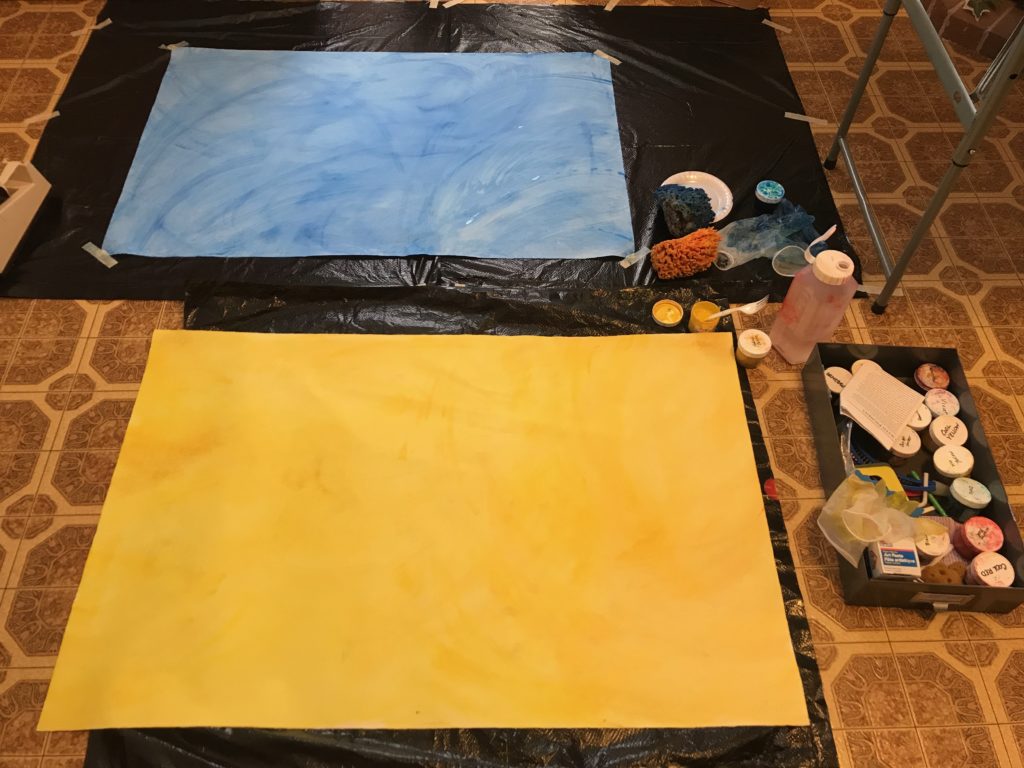
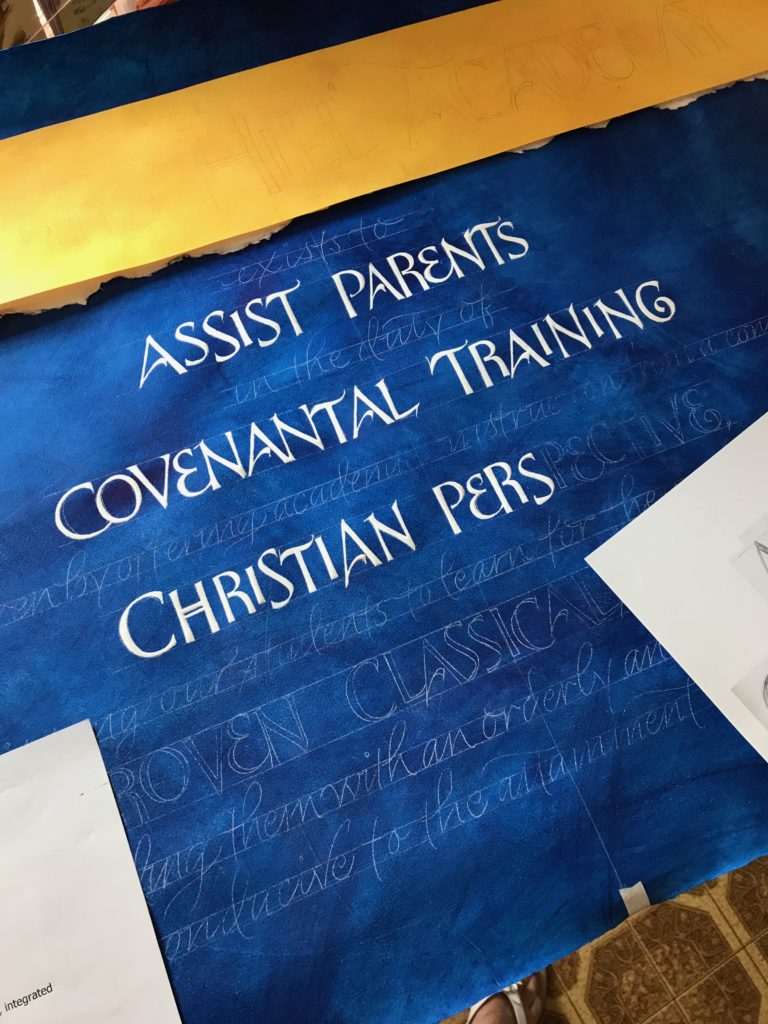
The Mars Hill Academy colors are blue, gold and white with touches of red. I decided to create a blue paste paper background on which to letter. The gold I brought in on a band across the top. Paste paper is a really fun way to introduce color into designs. I especially love the texture that it brings so that the final is not to sterile or stiff looking. In the pictures, you will see little jars of dye that I buy from Twinrocker paper. With paper mâché paste, I use a natural sponge to place this color on the Arches Text Wove paper. The first layer is usually light with subsequent layers darkening the color.
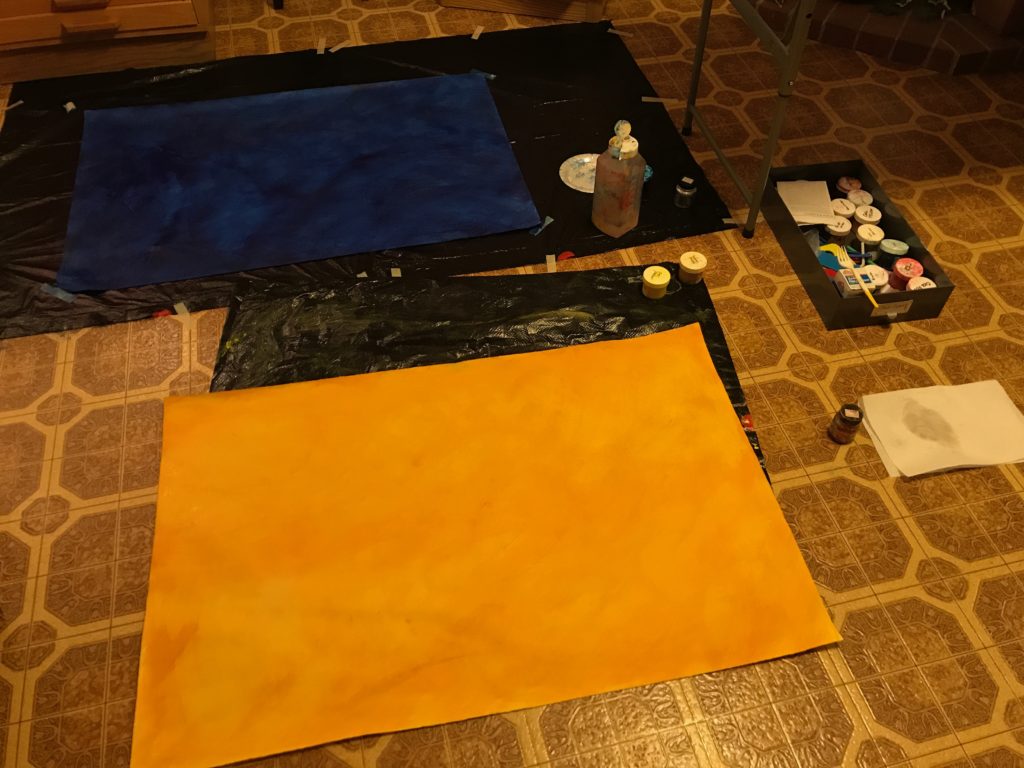
I took this picture at night, so it’s a little dark, but you can see the blue and gold have several layers to give them a rich look.
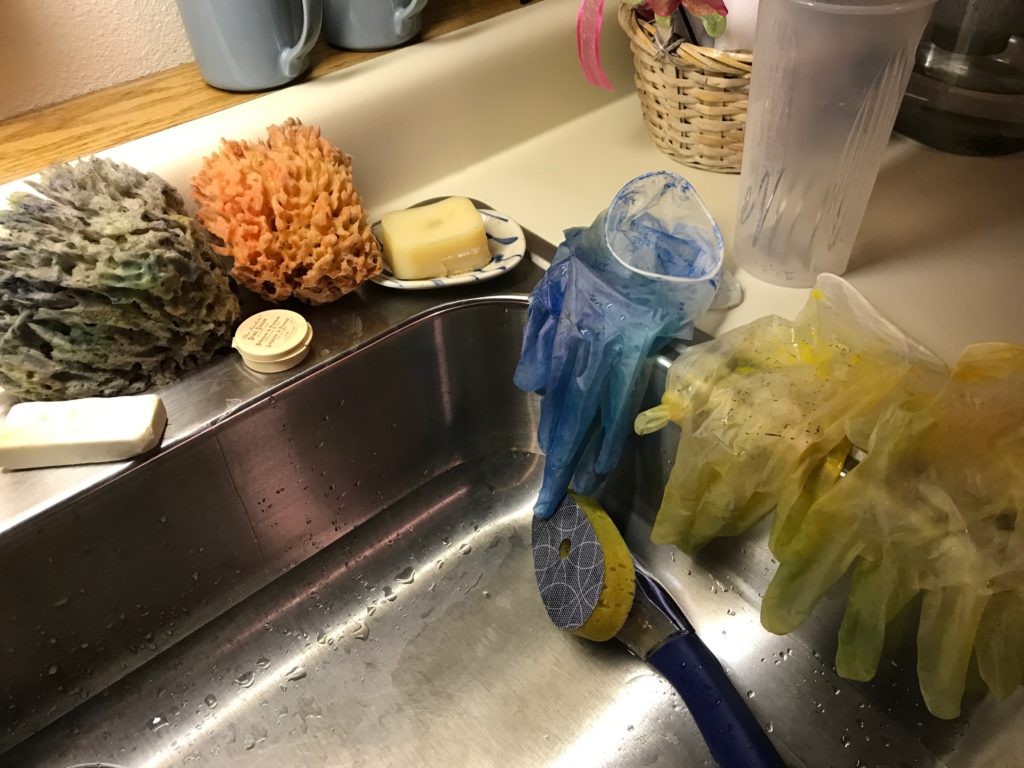
My studio sink displays the natural sponges, soap for clean up and the rubber gloves that I buy from Costco. My hands would be a real mess without them, as this dye wants to hang around under your nails, etc.

Mars Hill has a Bell Tower that is well known at the school. Lisa and I toyed with this as an icon instead of their crest logo. In the end, we stayed with the crest logo below.
Once I had the paste paper ready, I took my sketches and positioned them where I wanted them on the paper. With white Saral Paper I transferred my letters onto the paste paper.

You can see the tracing lines that the Saral Paper leaves. This gives me a great guide for the lettering. I was also feeling as though the piece needed a little more life. I planned to attach the gold band with the schools name, but it was boring alone. I pulled out some of my Twinrocker handmade paper and took a look at what it would look like as a small deckled border.
My next step was lettering the capitals. Dr. Martin’s Bleedproof White paint really helps your letters to ‘pop’ on paste paper as well and other dark fine art papers. I highly recommend it.

In the image above, you can see that I’ve now lettered the italic stylized script, the school name and painted the school logo. The logo took me quite a bit of time as I hand drew all of the little letters and had to paint around them in blue. 
It was still lacking some depth and interest…..so…..Lisa suggested that I add the red. I cringed at first as I thought it would clash, but in the end, I think it brings a new dimension to the artwork. As I near the end of a design, I ask myself…what else does this need? I wanted even more on the piece, so I took pastel and shaded around the first letters of the key words in the Mission Statement. It helped to tie in the gold banner across the top as well as accentuating the meaning.

Here you can see the completed parts….the blue paste paper with white lettering and pastel. The gold band with school name and logo and the Twinrocker paper…..these are all photos taken with my digital camera. If you have another minute, scroll back up to the top and take another look at the final scan of my artwork. It will show you the lovely texture in the paper and all of the pieces flattened out. I shipped the art to my framer in Cincinnati (I’m currently living in Oregon). He dry mounted the calligraphy pieces and handmade paper together and saved the school a little money by framing it in their town.